
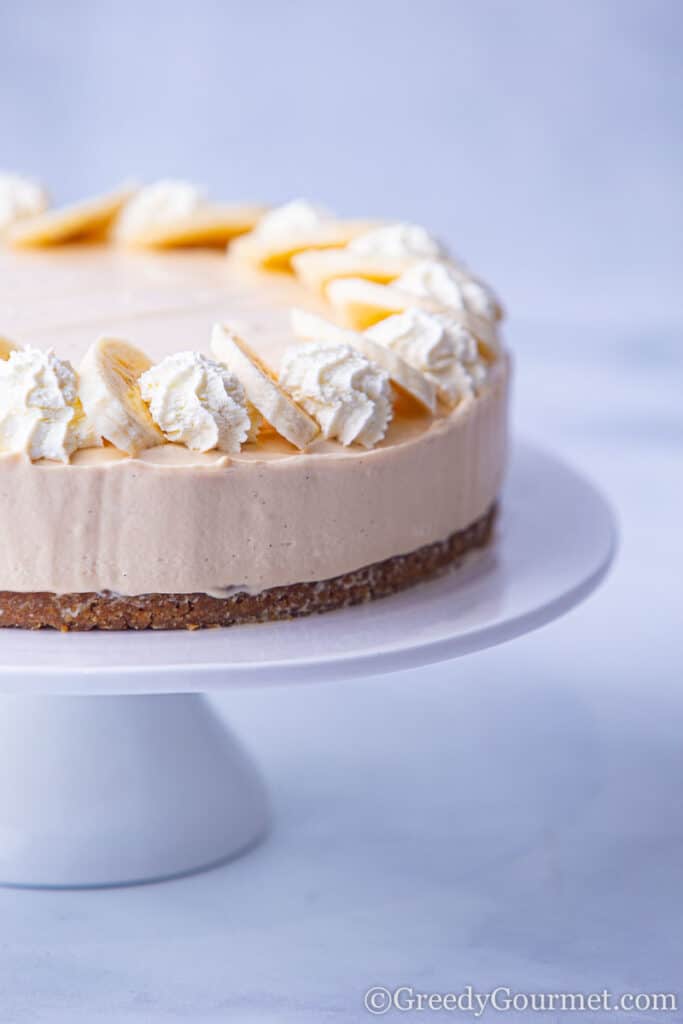
Banoffee Cheesecake is a no-bake dessert that layers a buttery biscuit base with creamy cheesecake filling, fresh bananas, and a drizzle of rich toffee sauce. This indulgent treat captures all the best flavors of the classic banoffee pie in a velvety cheesecake form. For more inspiration, browse these no bake cheesecake recipes.
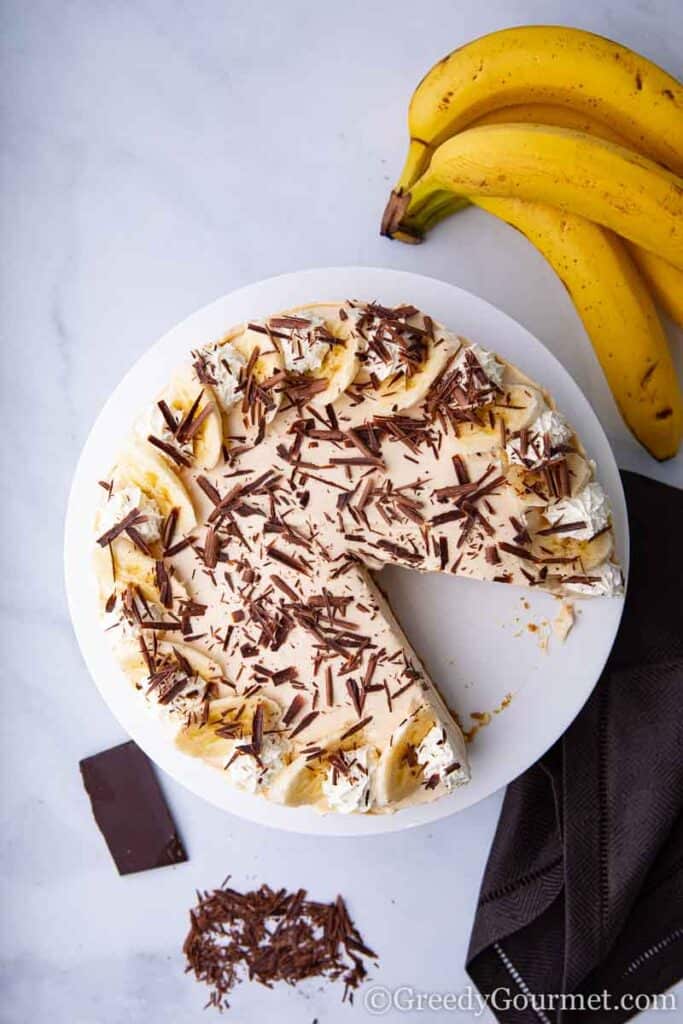
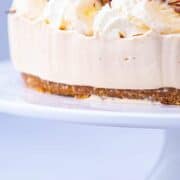
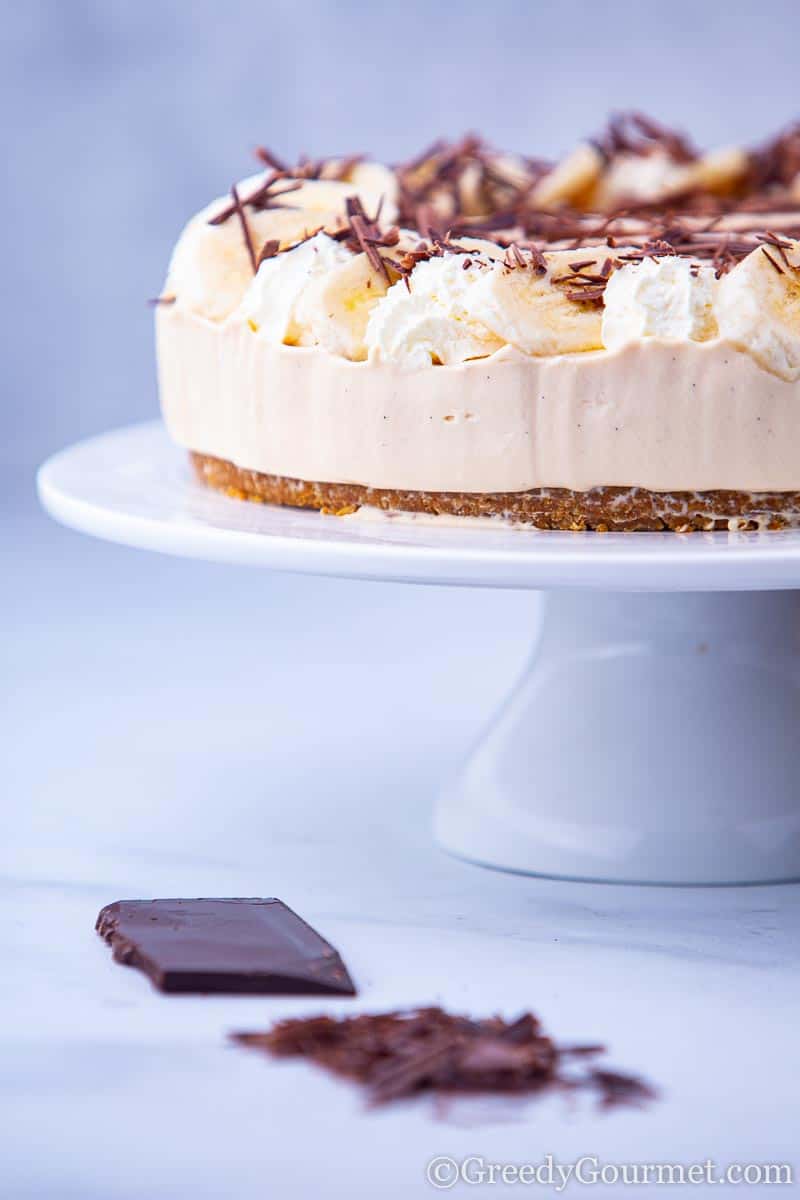
A buttery crunchy biscuit base. A layer of sliced bananas followed by a generous layer of luscious caramel sauce cream cheese filling, topped with chocolate shavings, fresh ripe bananas and another helping of whipped cream.
Pure mouth watering decadence! Here’s my take on a classic banoffee cheesecake.
Products you need for this recipe
Before making this banoffee cheesecake, let’s take a look at some of the items you’ll need:
- Springform cake tin – an essential piece of kit for no bake cheesecakes, using a springform cake tin is the best way to make sure your banoffee cheesecake stays intact after it has set
- Palette knife – a great tool when it comes to flattening down your biscuit base and then smoothing out your cream cheese filling. Palette knives are also really handy when it comes to removing cheesecakes from the tin
- Food processor – using a food processor is the best way to mix up your biscuit base. If you don’t have one, there are a couple of other methods, as you’ll see further on in this article
- Stand mixer – a pricey investment, but totally worth it, especially if you plan on baking on a regular basis, a stand mixer is the best way to get that luscious thick whipped cream mixture
- Vanilla paste – quality vanilla paste brings such a wonderful flavour to this cheesecake. You could use vanilla extract or vanilla pods, but vanilla paste is a combination of the two and has a lovely deep rich flavour
- Chocolate blossoms – chocolate blossoms, or chocolate shavings, are a great way to decorate the top of your cheesecake. If you’re a fan of white and dark chocolate, try marbled chocolate blossoms
Banoffee cheesecake recipe
Who doesn’t love a cheesecake?! A sure-fire way to put a smile on the face of just about everyone, cheesecakes are the ultimate indulgence. When you need to bring a little slice of joy, only a cheesecake will do.
I’ve got a few favourites and banoffee cheesecake is definitely up there. There’s something about the combination of banana and caramel/toffee sauce mixed in with cream cheese and vanilla that’s just so simple and so satisfying.
If you’re a cheesecake pro, you’ll know. If you’re a newbie I’m excited for you! This is a great recipe for first-timers – it’s pretty straightforward, there’s absolutely no baking to worry about and the decoration is all about getting creative.
When all is said and done, you’ll be left with a beautiful banoffee cheesecake that looks and tastes like a dream!
Banoffee pie
This banoffee cheesecake is a twist on a classic British dessert – banoffee pie. Banoffee pie is traditionally made from fresh bananas, cream, and toffee sauce – the toffee sauce is made from condensed milk or dulce de leche.
All this on top of a buttery biscuit base. In fact, it’s very similar to a banoffee cheesecake.
It’s thought that the original banoffee pie was invented in 1971 by Nigel Mackenzie and Ian Dowding, the owner and chef of the Hungry Monk restaurant in East Sussex, England. They say they were inspired by an old American recipe for coffee toffee pie.
After experimenting with flavours to mix with the toffee sauce for several hours, including mandarin and apple, they settled for banana and instantly knew they’d struck gold.
Banana + toffee = banoffee. There we have it – banoffee pie!
How to make banoffee cheesecake
Making this no bake banoffee cheesecake is pretty straightforward, especially if you have a stand mixer and a food processor.
Would you like to save this?
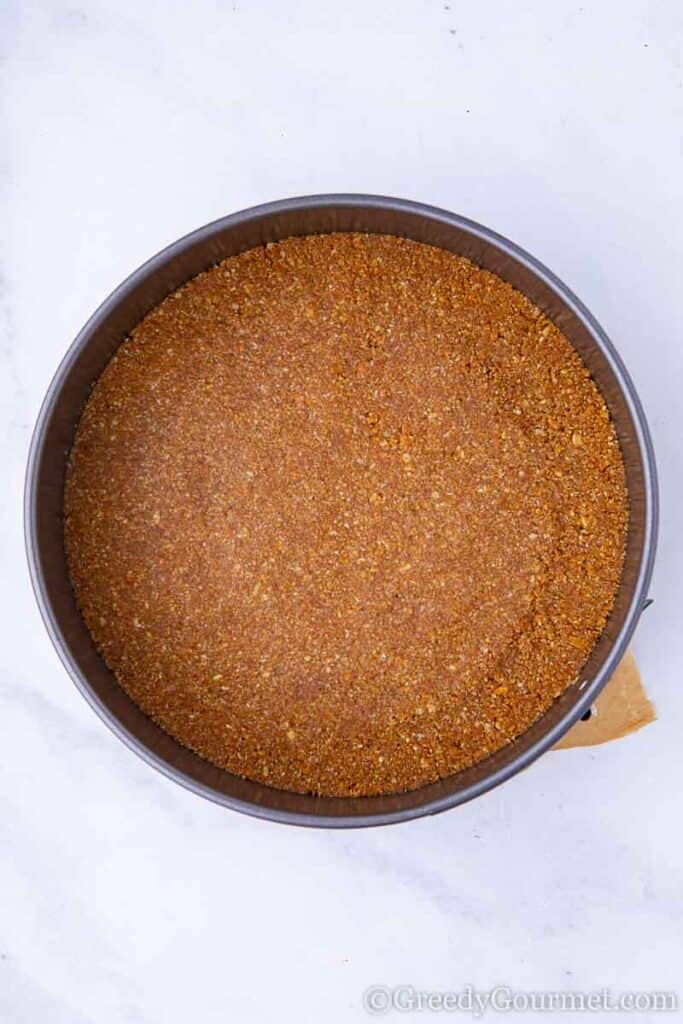
The first step is to make the buttery biscuit base. It’s as easy as melting butter in a pan, blitzing up biscuits in your food processor, then gradually adding the melted butter as you blitz the biscuits.
You’ll then make the base of your cheesecake by spooning the crumbly biscuit mixture into the tin. Flattening it down with the back of your wooden spoon or palette knife is important here – you’ll want it to be fairly dense. Pop it in the fridge.
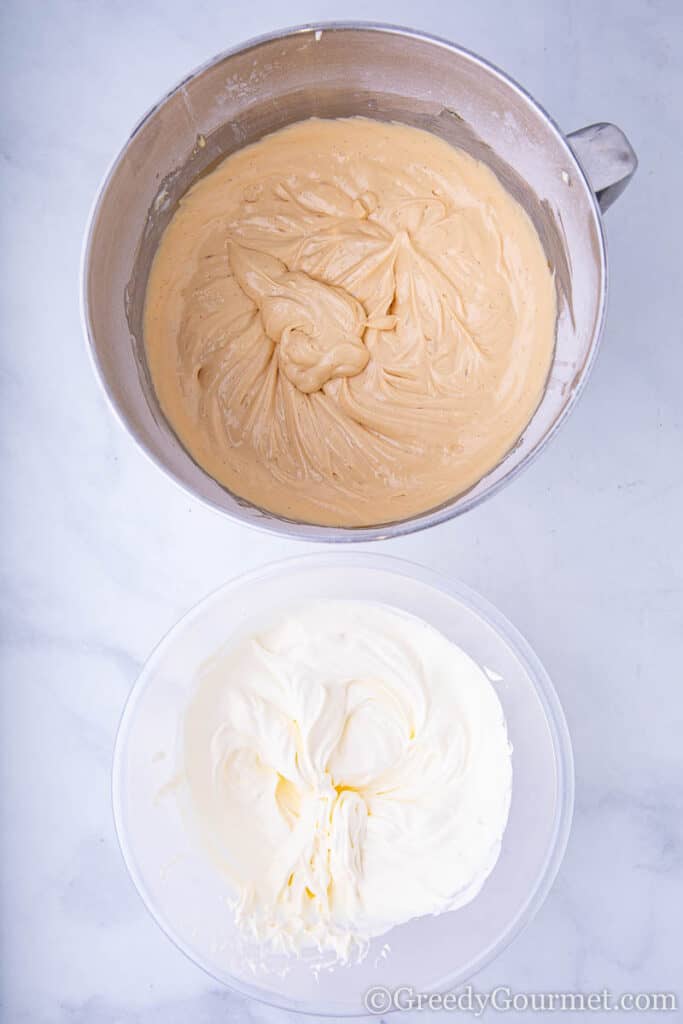
Next comes the full fat cream cheese filling. This is where your stand mixer comes into its own. The full fat cream cheese (always full fat) goes into the mixer, along with the vanilla paste.
While it’s mixing on a slow speed, you’ll add the icing sugar, then the caramel/toffee sauce. This is going to create a velvety soft mixture.
After whipping up the double cream in a separate bowl, you’ll fold it into the cream cheese mixture to form the mouth watering cream cheese filling.
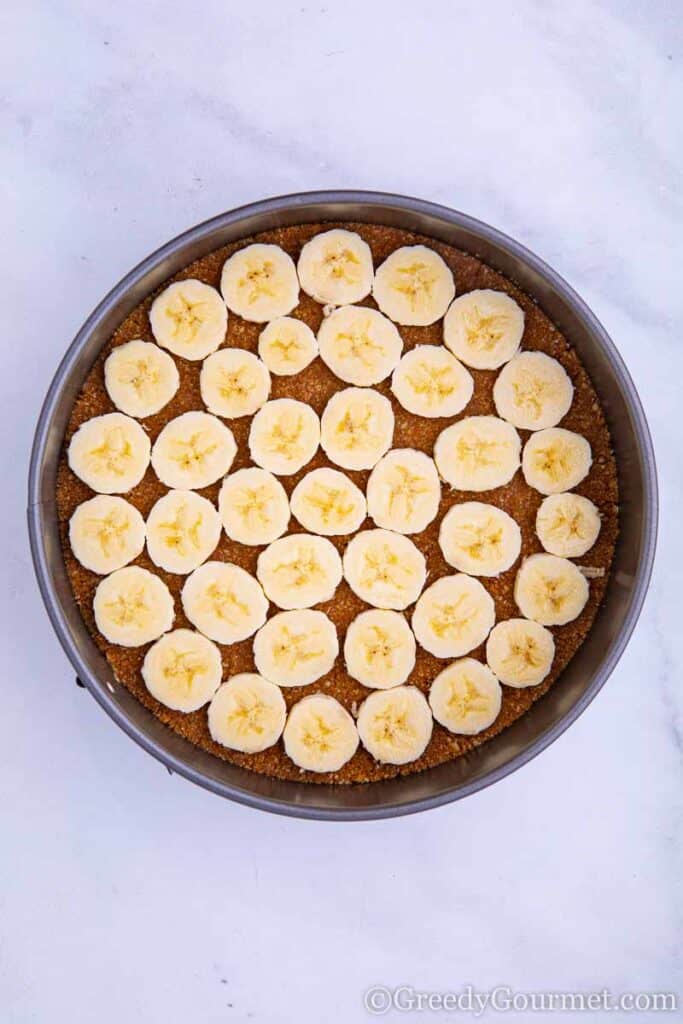
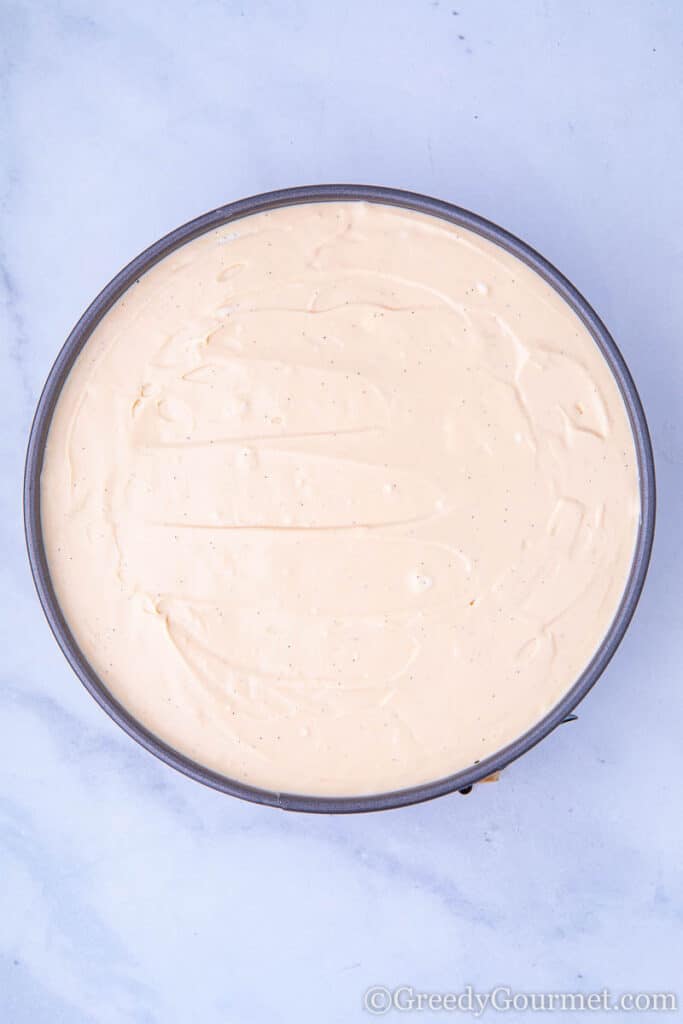
The cheesecake base comes out of the fridge, a layer of sliced banana goes on top, then you’ll spoon the cream cheese caramel sauce filling on top.
After smoothing it out with your palette knife and resisting the urge to bury your face in it, you’ll place it in the fridge to cool for at least six hours.
I know, I know. Six hours! Trust me though, if you can wait that long you’ll be rewarded with something truly glorious.
Once your banoffee cheesecake is set, now comes the fun creative part – the decoration! Use fresh banana slices, chocolate shavings, whipped cream, chopped nuts and make sure to drizzle some hot caramel sauce on top!
For proper measurements and detailed instructions, see the recipe at the bottom of the page.
No bake vs baked cheesecake
The big difference between the two is the baked cheesecake contains eggs and is baked in the oven, whereas no bake cheesecake doesn’t contain eggs and sets in the fridge.
The filling for no bake cheesecake tends to be a little creamier and almost mouse-like, as there are no eggs. Also, no bake cheesecakes are a lot easier to bake and get right, as you don’t have to worry about timings and temperatures.
What tin should I use?
When making a cheesecake, the best tin to use is a springform tin – see ‘Products You Need For This Recipe’ above for the ideal tin. This is because you can’t flip cheesecakes out of the tin the way you can other cakes.
With a springform tin, you can just flip the catch on the side, which unlocks the side of the tin. Also, you don’t need to line the base of a springform tin when making cheesecake.
How do you remove a no bake cheesecake from the tin?
As long as you use a springform tin when making this no bake banoffee cheesecake, it’ll be quite simple to remove.
The first step to being able to remove your cheesecake with ease is to make sure the base of the tin is the right way round.
You’ll notice there’s a little ‘lip’ on the base of the springform tin. You want this to be facing downwards.
Make sure you’ve got a cake stand or a serving plate on hand to transfer your cheesecake after removing it from the tin.
Once you’ve unclipped the side of the springform tin, carefully run a butter knife around the edges. Use kitchen towel to keep the knife clean and, eventually, you should be able to make a clean break and remove the side of the tin.
To remove the cheesecake from the base, first run your palette knife around the edges to loosen it. Then, you could either use a cake lifter – a great little tool that makes life so much easier – or two palette knives to carefully lift your cake off the base and onto the plate or stand.
Finally, use your palette knife to smooth out any imperfections. Now your cheesecake is ready to decorate!
How do I make the crumb mixture if I don’t have a food processor?
If you don’t have a food processor, the easiest way to get the perfect biscuit base is to crush the biscuits in a bowl using an empty wine bottle. Better yet, use a prosecco or cava bottle – the deep groove and the ridges on the bottom make them ideally suited for grinding.
If you’re a tee-totaller, fear not! You could also use a rolling pin to grind up the biscuits.
Why does a cheesecake need to cool in the fridge?
When you make a no bake cheesecake, whisking the creamy filling gives it a silky, mousse-like consistency that’s absolutely delicious. This airy cream cheese filling needs to set, however.
That’s why it needs to be refrigerated. When chilled, the filling becomes solidified, giving it that stable cheesecake structure. Chill it properly and your cheesecake will look professional and irresistible.
Chill your banoffee cheesecake for at least 6 hours. However, for that extra-set perfect texture, chill for 12 hours – essentially overnight. Trust me, it’ll be more than worth the wait!
How do you store cheesecake?
Your banoffee cheesecake will stay delicious for up to five days in the fridge. Still, if you can resist the urge to scoff banoffee cheesecake for five days then, quite frankly, you deserve a medal.
Although you can freeze cheesecake, I wouldn’t recommend it. Something this divine should be enjoyed at its best.
If you do want to freeze your banoffee cheesecake, do it before adding the final decorations. Either place it whole in a large freezable airtight container or slice it into portions.
More indulgent cheesecake recipes
If, like me, you’re a sucker for a cheesecake, you’ll no doubt be demanding more satisfaction. Well, feast your eyes on these:
- No bake cheesecake with cool whip – perfect for those who crave a creamy and delicious dessert without the hassle of baking
- Easter egg cheesecake – standard Easter eggs? Pfff… who needs them when you’ve got something this good? Dangerously tasty, it might well become your new Easter tradition
- Fruits of the forest cheesecake – a fruity classic that’ll tingle your taste buds
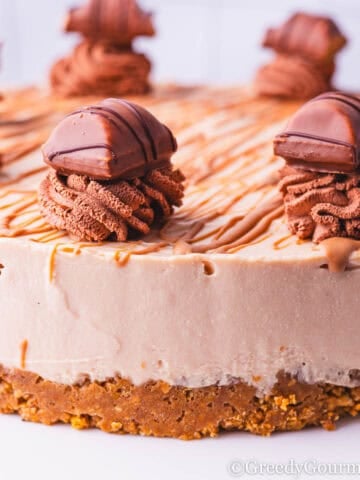
- Kinder Bueno cheesecake – this decadent delight is a chocoholic’s dream come true
- Gin and tonic cheesecake – a cheeky little cheesecake that doubles down on indulgence
- Chocolate orange cheesecake – chocolate… orange… cheesecake. Three words that, when said together, instantly make your mouth water
📖 Recipe
Banoffee Cheesecake
- Total Time: 30 minutes
- Yield: 12 servings 1x
- Diet: Vegetarian
Description
Banoffee Cheesecake is a fun play on the famous British dessert, Banoffee Pie. You can't go wrong with combining toffee and banana. Decorate to your heart's content!
Ingredients
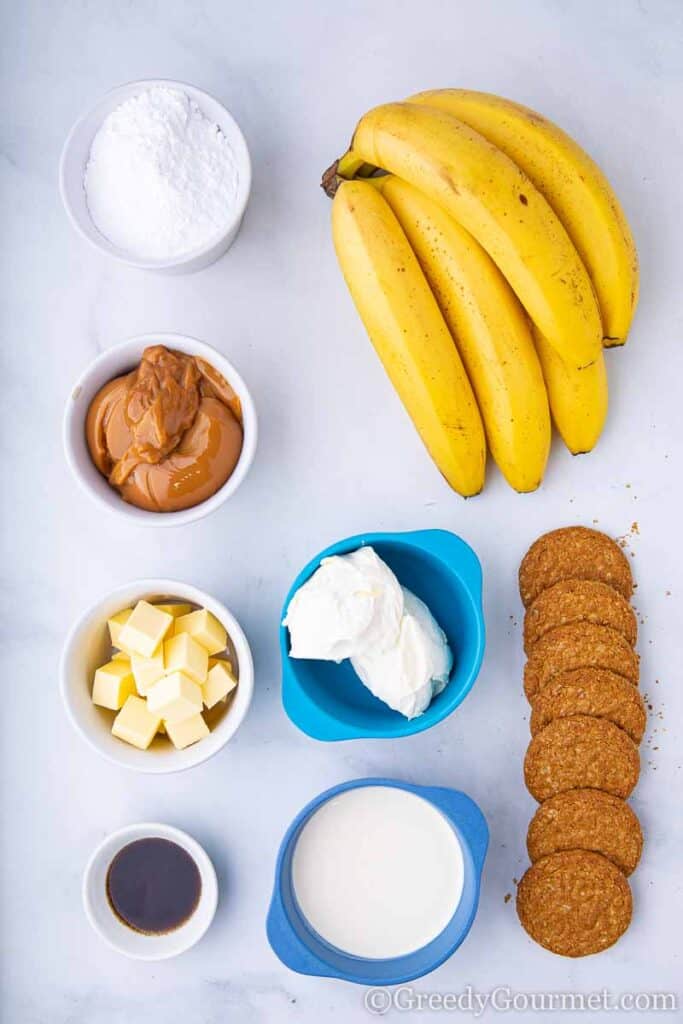
Biscuit Base
- 300g (3 cups) oat biscuits, such as Hobnobs
- 150g (⅔ cup) unsalted butter, melted
- 2 bananas, peeled and sliced
Caramel Cheesecake Filling
- 500g (2 cups) cream cheese
- 5ml (1 tsp) vanilla paste
- 100g (⅘ cup) icing sugar
- 200g (½ can) caramel, such as Carnation
- 300ml (1 ⅕ cups) double cream
Cheesecake Decoration
- 125ml (½ cup) double cream, whipped
- 1 banana, peeled and chopped
- 200g (½ can) Carnation caramel [optional]
- 50g (½ cup) chocolate shavings
Instructions
- For the Biscuit Base: Blitz the biscuits in a food processor until a crumb is formed.
- Pour the melted butter while the machine is running.
- Spoon the mixture into the base of a 23cm (9in) springform cake tin and level with the back of a spoon.
- Place in the fridge to set.
- For the Caramel Cheesecake Filling: Place the cream cheese and vanilla paste in a stand mixer.
- While running the mixer at a low speed, slowly add the icing sugar, until everything is incorporated.
- Add the caramel and continue mixing until everything is well incorporated.
- In a separate bowl, whip the double cream until soft peaks form.
- Fold the whipped cream into the cream cheese mixture.
- Remove the biscuit base from the fridge and arrange a single layer of banana slices on top.
- Cover the whole base with the cheesecake filling, then gently drop the tin onto the kitchen counter a few times to let any bubbles out.
- Place the cheesecake in the fridge to chill for at least 6 hours, or preferably overnight.
- For the Cheesecake Decoration: Use whipped cream, banana slices, drizzled caramel (heat it gently first!) and chocolate shavings to decorate the cheesecake to your preference.
- Serve immediately. Enjoy!
Notes
- Make sure your banana slices cover the whole biscuit base. If not, use more. If you make the banana slices on the thick side, you will need more bananas.
- If you find you have too much cream cheese leftover that you can't use, check out my guide on freezing cream cheese to make sure it doesn't go to waste sitting in your fridge!
- Prep Time: 30 minutes
- Cook Time: 0 minutes
- Category: Dessert
- Method: Chill
- Cuisine: British
Nutrition
- Serving Size: A big wedge
- Calories: 551
- Sugar: 40.8 g
- Sodium: 343.7 mg
- Fat: 34.9 g
- Saturated Fat: 21 g
- Trans Fat: 0.2 g
- Carbohydrates: 57.4 g
- Fiber: 1.9 g
- Protein: 6 g
- Cholesterol: 89.3 mg


Ross Leech
Lemon & Lime Cheesecake.
Tracy Barber
My favourite is a New York Cheesecake but this banoffee looks so delicious that could all change, we'll have to see when I've made it
Tammy Neal
Banoffee x
Aileen
The cheesecake looks lovely! My favourite is chocolate cheesecake
Ree J
Peanut butter cheesecake. Love the one from the Cheesecake Factory in the States.
Kallie Maile
I love cherry cheese cake. my mum also makes a fab toblerone cheesecake
Amanda Botterill
I love lemon cheesecake - heavenly
SUSAN L HALL
I love Strawberry and chocolate drizzle Cheesecake
Ellen Stafford
I love salted caramel cheesecake! I might have to try banoffee cheesecake now!
Alex McKay
My favourite is any that is homemade for me! The effort makss it delicious!
sharon martin
i like a lemon & raspberry cheesecake
Charlotte F
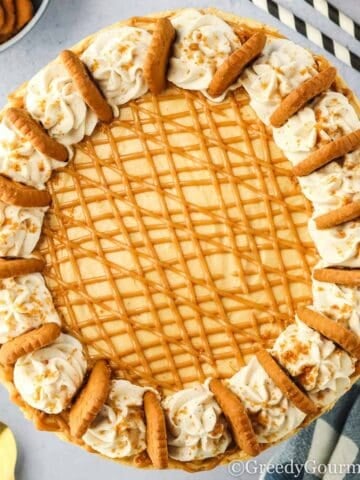
I love all cheesecake! I recently made a lotus biscoff cheesecake which was delicious!
Adrian Bold
I love a nice salted caramel cheesecake.
Emma England
My favourite cheesecake is a simple lemon cheesecake but cheesecake is one of my absolute favourites and I will eat any flavour!
Miss Tracy Hanson
Hard decision, but SALTED CARAMEL for me. Thanks for the chance.
chris bull
I love a vanilla baked cheesecake and then decide on serving what I want to top it with
Erica Hughes
Lemon cheesecake
Ann Calland
Red Velvet cheesecake is my favourite.
Bev Cannar
Strawberry every time for me
Alicia Piles
My favourite cheesecake is strawberry 🍓
Leslie Evans
Lemon
Patricia Barrett
I love a banoffee cheesecake.
Emma Whittaker
My favorite cheesecake is Lemon
Darren Bourne
I like strawberry cheese cake but also love banoffee pie so would like to try this.
Marie Rungapadiachy
I love New York cheescake. It is just so delicious.
Helen
I love a good homemade lemon cheesecake!
Sheri Darby
My mum's old fashioned home made baked cheesecake
Hazel Rea
Strawberry is definitely my favourite with Raspberry a close second.
Helen Rosbotham
Maltesers
James Travis
Chocolate cheesecake is my favourite
Emma Davison
Lemon
Mandy Betts
Chocolate cheesecake
Nicola McC
My favourite cheesecake is good, ol', boring vanilla!
Kerry Wild
Chocolate Orange cheesecake i my fave closely followed by mint Aero
Zoey H
Love a good white chocolate cheesecake
Jayne K
I love a baked cheesecake with lemon and sultanas in
Louise
Chocolate chip cheesecake
Michelle Turner
I love chocolate cheesecake
Angela Kelly
I love lemon cheesecake made with marscapone cheese.
joanne coulson
Lemon cheesecake is my ultimate favourite
joanne coulson
Lemon cheesecake is my ultimate favourite
Karen R
I love Banoffee Cheesecakes xx
Karen R
I love Banoffee Cheesecakes xx
Susan B
Baked New York style. Must be served with double cream, though!
Susan B
Baked New York style. Must be served with double cream, though!
Rachel B
love a nice sharp Lemon Cheesecake
Rona Williams
Love a Biscoff cheesecake
Peter Nickson
banoffee cheesecake my favourite
JAMES HOLYLAND
Strawberry cheesecake
Angie Jackson
salted caramel baked cheesecake
Amy Bondoc
love banoffee cheesecake.
Anne Eames
Lemon cheesecake is my favourite
Jo Young
Salted Caramel Cheesecake is my favourite!
Tammy Tudor
Chocolate cheesecake has to be my favourite, but I have to say I have not tried banoffee cheesecake it sounds delicious, I am going to try!
Jacob Barnard
My Favourite Cheesecake is original cheesecake!
Sandra Siddall
My favourite cheesecake is definitely the Salted caramel cheesecake, it tastes amazing!
Kat
Favourite cheesecake? I'm afraid I'm going to go with basic strawberry. Home-made, of course.
Mark R
A baked New York cheesecake is my favourite
Victoria Prince
I love lemon cheesecake. That banoffee one sounds amazing though. Definitely one I need to try!
Keith Hunt
Lemon Blueberry Cheesecake
Sarah hutt
Strawberry cheese cakes my favorite yum
Denise Cross
BANOFFEE CHEESECAKE
Karen Usher
I do love a classic vanilla cheesecake but the sound of the banoffee cheesecake is making my mouth water!
Isabell Whitenstall
I like a strawberry cheesecake.
Helen W
Lemon & Lime
Vicky H
Looks yum my favourite cheesecake is toffee cheesecake I make a Oreo cheesecake that is really nice.
Felicity m
I came to Banofee late and am making up for lost time!
Laura Bryant
Biscoff cheesecake
TonyG
vanilla baked cheesecake
Ruth Harwood
When it comes to cheesecake, I'm of the opinion that vanilla cheesecake is the best - original flavours usually are!
Jules page
I love cherry cheesecake.
Emma Wolski
Banoffee! Ultimate fave for many I think!
Carolyn E
I love a chocolate and raspberry cheesecake
claire woods
Lemon cheesecake
Nicola S
I like my cheesecake natural, with some fruit on the side.
Tracy Newton
I love a baked vanilla cheesecake
Sally Collingwood
I like Strawberry Cheesecake!
melanie stirling
I'm sure this would probably be my favourite cheesecake as Banoffee pie is my favourite dessert. I love chocolate cheesecake though.
Angie McDonald
I love salted caramel cheesecake
Jan
Lime cheesecake
Hannah Lord
I love a black currant cheesecake the tangy sharpness of the currants with the smooth creamy cheese are the perfect combination
Natalie Charman
I made a blood Orange cheesecake a few years ago. It was epic!
Charlotte isobelle
Mine is banoffee actually so would love to try it!
Lorraine Williams
Blackcurrant cheesecake is delicious
Laura Pritchard
Passionfruit Cheesecake
christine goody
My favourite cheesecake is strawberry.
Ben Audsley
vanilla cheesecake baked of course!
Kelly
Looks delicious! Banofee up there with my favourite peanut butter cheesecake.
Alice Gilkes
As a huge chocoholic, my favourite chocolate has to be chocolate.
Eileen Hindley
banoffee cheesecake
A S,Edinburgh
My favourite cheesecake is chocolate, but I love adding various other flavours, like orange, caramel and pecan, or Bailey's. Cheesecakes are such a great dessert; they're so versatile!This banoffee one comes in close second though!
Sheena Batey
Amaretto and white chocolate
lynn neal
This Banoffee cheesecake is in my top 5 favourite cheesecakes. Salted Caramel remains the best!
Helen
I love raspberry cheesecake.
john prendergast
my favourite cheesecake is salted caramel
Craig L
it looks simple and delicious in the same time
Helen Markham
Wow this was amazing
Phil Read
I love salted caramel cheesecake.
kathleen warwick
I just love all flavours of cheesecake
Samantha
we like milkybar cheesecakes
MARK THOMAS
My favourite cheesecake flavour is lemon .
Kim M
Love Strawberry Cheesecake with fresh cream x
pete c
a pineapple flavoured one would be my favourite
Sue Hodges
my fav cheesecake is now this banoffee one
Karen Richards
Love blackcurrant cheesecake.
Joo Dee
can't beat a nice plain New York cheesecake tbh, but had a Biscoff cheesecake in a pub a couple of years ago, and it was the best thing I have ever tasted!
Iain maciver
strawberry cheesecake
Susan Lloyd
I love lemon cheesecake x
Claire Driver
Strawberry cheesecake nice and refreshing
Rena Plumridge
Vanilla is my favourite flavour of cheesecake
Kristyn Harris
I love cheesecake! The best I have ever tried was cherry cheesecake! Truly Scrumptious!
Alice Dixon
I love a strawberry cheesecake
Margaret Gallagher
Strawberry
Jo m welsh
I love a lemon cheesecake
Michael Fisher
Any as I have no favourites and just like them all.
Carly Belsey
I love a chocolate orange cheesecake but I also do love a toffee or banoffee one. Delicious
Renil M. George
Look at that banoffee cheesecake.
claire
raw egg? No baking?
Maryam
it looks simple and delicious in the same time
Duncan Chamberlain
I had friends over for dinner last Saturday and tried this recipe, the plate was licked cleanby all and I will be making it again - thanks Michelle
Kevin
That cheesecake looks amazing!
Ivy
I love banoffee cheesecake and made it a few months ago using dulce de leche.
Katrine
Wow, awesome combination of flavours!