Is there anything better than fresh homemade bread? A wonderfully tasty Indian starter, gluten free puri is light, healthy and oh so satisfying.

From pan to plate in mere minutes, you’ll be mopping up the juices of your favourite curry in no time at all. Puri is a people pleaser, there’s no doubt about that! So, let’s find out how to make it, shall we?
Products you need for this recipe
Here are a few key items you’ll need to make this recipe:
What is puri?
Puri (sometimes called “poori”) is a small, round Indian flat bread that is made from four simple ingredients – flour, milk, salt and water. That’s it!
The ingredients are made into a dough, which is then needed and left to rest. Once rested, the dough is deep fried in hot oil.
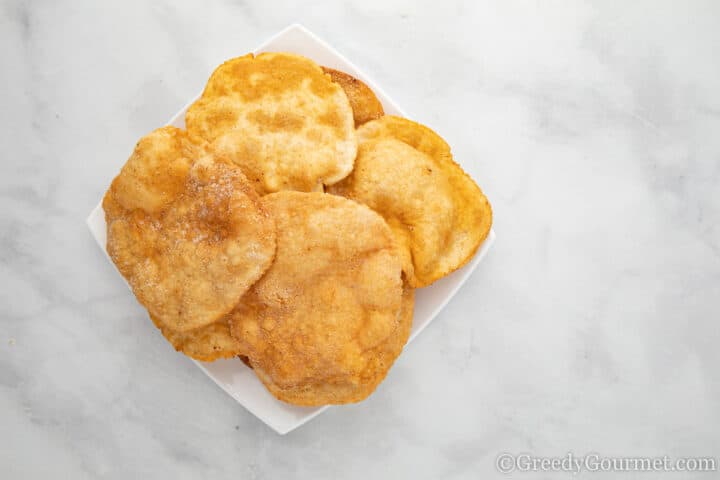
Deep frying the puri gives it a wonderful flavour. You end up with a soft, light bread. That lightness is the perfect match for a rich, spicy curry.
Why is it called “puri”?
The term ‘puri’ derives from the Sanskrit word ‘pura’ which means filled. That’s because puris are made to be eaten with a filling. My favourite filling? Well, I’m glad you asked...
The best puri filling?
For me, the very best filling for a homemade puri or “poori” recipe is prawn puri. Check out my prawn puri recipe for the perfect combo to this recipe.
What is the difference between rotis and puris?
Both puris and rotis are unleavened bread, meaning they are made without the benefit of a raising agent. However, while rotis are cooked on a hot tava or pan, puris are all about deep frying.
Other types of Asian breads include chapatis, parathas and naans.
What makes this recipe gluten free?
Puris are usually made with chapati flour, which is made using wheat.
This recipe, however, uses gluten free chapati flour. The result is a delicious, light, healthy, gluten free Indian snack.
What is chapati flour?
Chapati flour, otherwise known as “atta” is a type of flour made from wholemeal wheat. It is the most used flour throughout the Indian subcontinent and is used to make flatbreads such as chapati, roti, naan, paratha and puri.
Chapati flour is VERY finely milled. When it is milled, the starch is broken down more than usual, creating an extra subtle sweetness. Also, the friction creates extra heat, which adds a flavor dimension not present in most Western flour.
This makes chapati flour unsuitable for typical bread making, but perfect for making Indian flatbreads!
What is gluten free chapati flour made of?
It’s usually a blend of anything from brown rice flour, pea flour, flaxseed flour and buckwheat to corn flour, bengal gram and guar gum.
What if I can’t find gluten free chapati flour?
It can be tricky to track down. Check the link in the ‘Products you need…” section above to buy it online.
You could also try your local Asian supermarket or international food store.
If you can’t find gluten free chapati flour, there are a few great gluten free alternatives you can use.
Rice flour is probably your best bet. It’s the most widely used in gluten free Indian flatbread recipes. Rice flour is gluten free and will help to keep your puris nice and light.
You can also mix rice flour with gram flour and tapioca flour for a gluten free flour that holds together better. Use 1.5 cups of rice flour, a ¾ cup of gram flour and ¾ cup of tapioca flour. You could also swap tapioca for arrowroot powder, or a suitable alternative.
Can you leave puri dough overnight?
When left to rest from between 30 minutes to two hours, you get the best texture to your puri dough.
However, don’t leave it out too long. Especially overnight. The dough will become stale and may even start to ferment.
How do you store puris?
Puris are definitely best served right away. They do travel really well though, which makes them ideal to take to dinner parties. Simply store them in an airtight container while still warm.
When puris cool, they can become chewy instead of light and fluffy. If you want to store them for later on, wrap them in a paper towel and then aluminium foil or an airtight container. You can keep them in the fridge for 2–3 days.
Can you freeze puris?
Yes, you can freeze puris before you cook them. Just place a piece of parchment paper between each puri and place them all in a ziploc bag.
Can you reheat puris?
If you want to reheat uncooked puris, just fry them as you would with normal puris. It will take a few more seconds than the regular one.
If you’ve already cooked them, you can reheat them in a microwave or air fryer. It should only take a few seconds.
Would you like to save this?
Tips for the perfect gluten free puri
- Add the water to the dough mixture slowly. This will help the ingredients bind. Be sure to add enough water, otherwise deep frying the puris will make them crispy.
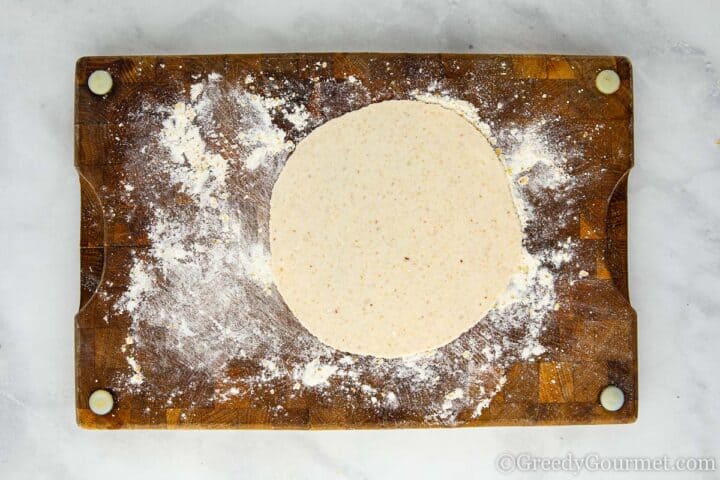
- Use a thin rolling pin to roll out the puris
- Getting the oil to the right temperature is vital! Too hot and you’ll end up with burnt puris. Too low and you’ll end up with oil-soaked hard puris. Test the temperature, either with a thermometer or by dropping a piece of dough into the oil. If it rises, it’s ready.
- Use paper towels to drain the excess oil.
More Indian snacks and starters
- Peshwari naan – light and fluffy and subtly sweet
- Keema matar – this curried mince is delicious!
- Kashmiri naan – a fruity, nutty naan that is often served with tea
- Makai ka soweta – a real interesting mix of ingredients makes this a must-try
📖 Recipe

Gluten Free Puri
- Total Time: 2 hours
- Yield: 12 1x
- Diet: Vegetarian
Description
Gluten free chapati tastes just as good as the original Indian puri recipe. Ensure you use a good quality chapati flour.
Ingredients
- 300g (3 cups) gluten free chapati flour
- 200ml (⅘ cup) water
- 15ml (1 tbsp) milk
- 3g (½ tsp) salt
- vegetable oil, for frying
Instructions
- Making the Puri Dough: Place the flour in a large bowl.
- Slowly drizzle in the water, while stirring the mixture to make it bind.
- Knead the dough for 5 minutes so that everything sticks together well.
- Add the milk and salt.
- Knead for another 5 minutes.
- Preparing the Puri Dough: Wrap the ball of dough in cling film, and leave it to stand, in a warm spot, for at least 1 hour.
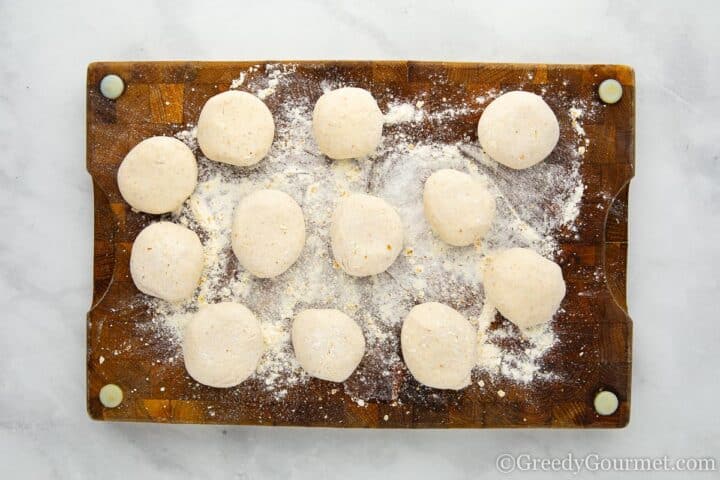
- Divide the dough in 12 equal pieces.
- Roll each piece into a ball then flatten, making it as round as you can. For best results, use a rolling pin.
- Cooking the Puri: Heat the oil in a large stainless steel pot. It shouldn’t smoke. Test to see if the oil is hot enough by dropping a small piece of dough into the oil. The dough should fry up immediately and come to the surface. You know the oil is not hot enough when the puri does not puff up, is flat and instead is also soaking up oil.
- Now drop the puri into the oil. While the puri is slowly coming to the surface, make sure to keep ladling in the hot oil on the surface. This helps the puri to puff up. Turn it so that it gets evenly reddish brown or golden yellow. Place it on a paper towel to drain off any oil. If fried correctly, it won’t retain oil.
- Fry the puri in batches.
- You can make Prawn Puri and serve the prawns on top of the puri to make this a great Indian starter.
Notes
- The amount of water needed is an estimate. The mixture might appear dry but don’t be tempted to add too much water to the dough. Be patient and keep kneading. Otherwise, you run the risk of the dough becoming too sticky, which means you’ll have to add more flour to dry it out.
- Prep Time: 1 hour 30 minutes
- Cook Time: 30 minutes
- Category: Side Dish
- Method: Deep Fry
- Cuisine: Indian
Nutrition
- Serving Size:
- Calories: 101
- Sugar: 0.1 g
- Sodium: 98.6 mg
- Fat: 1.4 g
- Saturated Fat: 1 g
- Trans Fat: 0 g
- Carbohydrates: 19.1 g
- Fiber: 0.7 g
- Protein: 2.6 g
- Cholesterol: 0 mg


Pam
Had to be very careful with the amount of water I added but it came out very well! fantastic as always Michelle
Michelle Minnaar
Thanks Pam, yes it can be tricky but as long as you're careful you should have no issues when sticking to the recipe.