
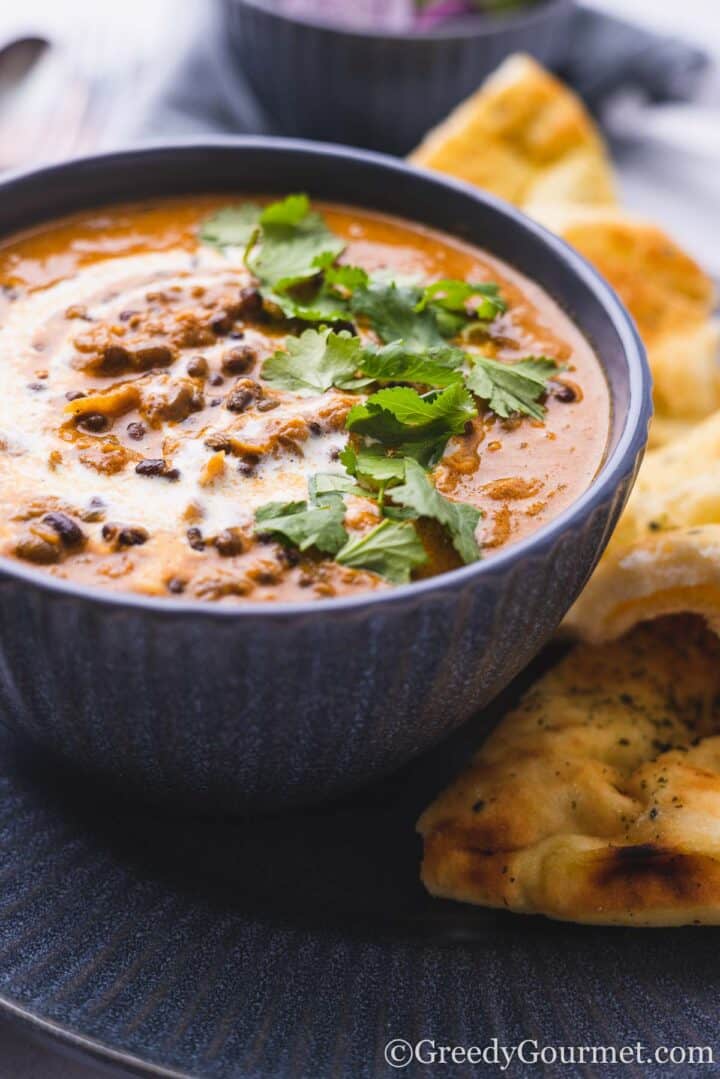
If you're a fan of vegetarian curries, you're in for a treat – this Dal Makhani recipe is truly one of a kind!
Luscious lentils slow cooked in a creamy, carefully spiced sauce, with a texture and taste that will blow you away. These are authentic Indian flavors, cooked in the comfort of your own kitchen.
So, if you're ready to cook this Indian classic, don your apron, line up your spices and let's get cooking!
Why you'll love this recipe
- With the mix of lentils, beans and subtle spices, the flavors are incredible!
- The creamy texture is melt-in-your-mouth fantastic
- It's easily stored and the next-day leftovers taste even better!
- While there are lots of ingredients, it's an easy to follow recipe
Equipment you'll need to make this recipe
There are a few essentials kitchen items you'll need before taking on this dal makhani recipe:
- Cast iron casserole dish – make sure you have a quality oven-proof casserole dish for this recipe
- Spice grinder – want to take this dish to another level. Grind your own spices!
How to make Dal Makhani
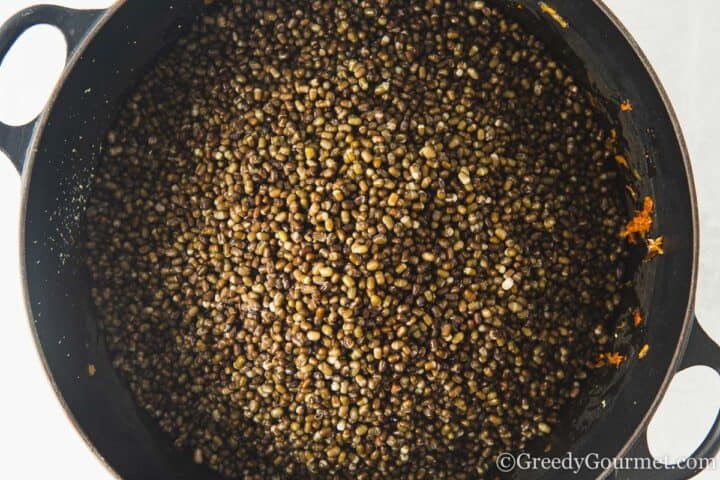
Soak the beans overnight then boil with ginger.
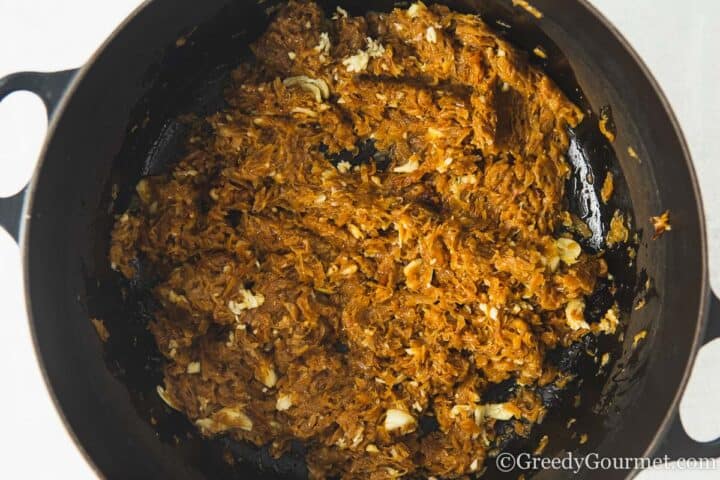
Fry the brown onion paste, garlic and ginger in ghee.
Stir fry for a few minutes.
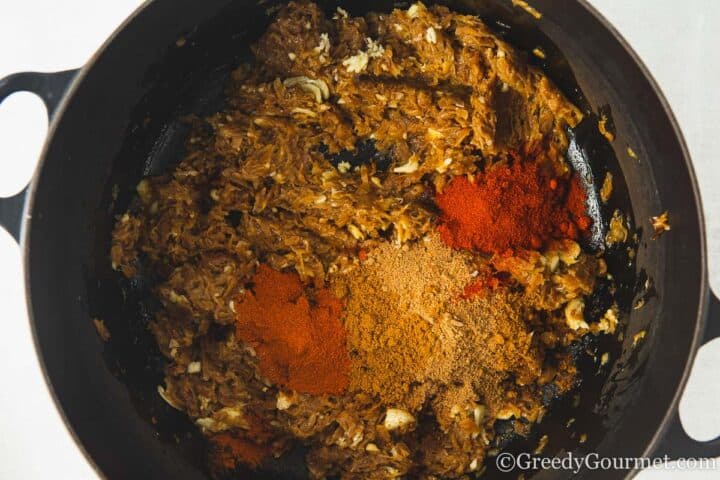
Sprinkle in the paprika, ground coriander, ground cumin and chilli powder.
Stir fry for another few minutes.
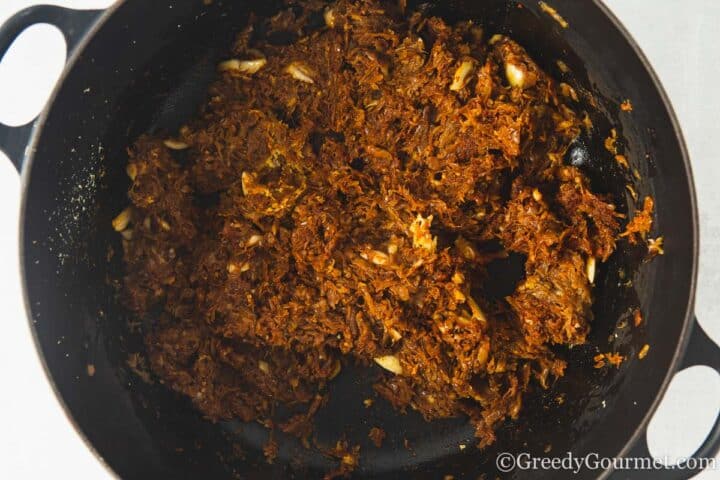
Add the cooked mung beans.
Give it a good stir.

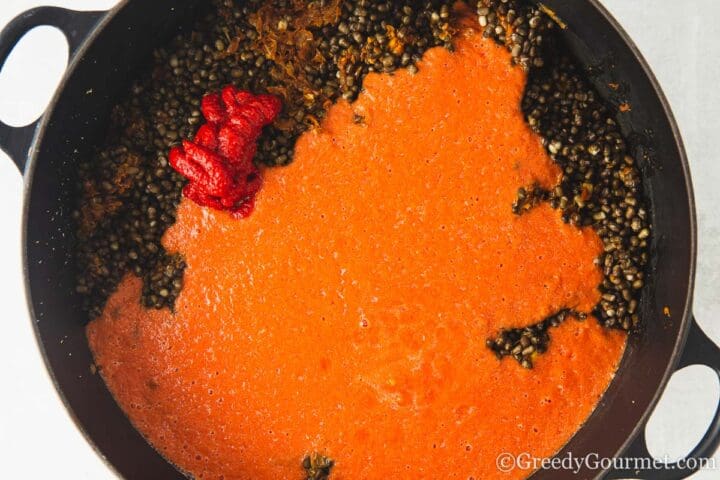
Add the tomato puree, chopped tomatoes and garam masala.
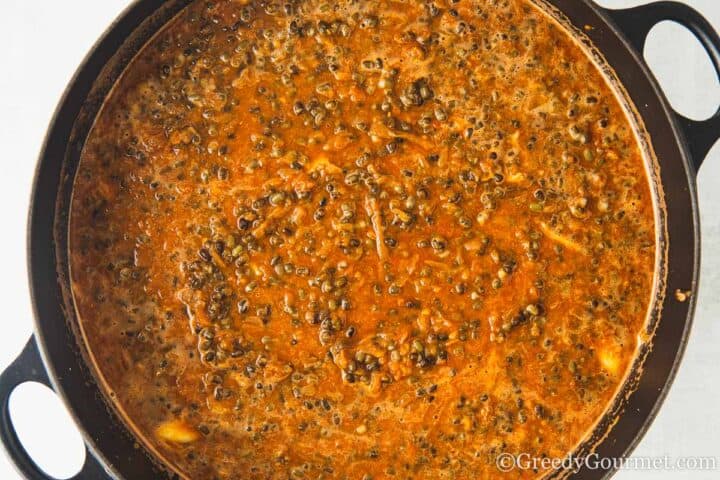
Cook for 3 hours.
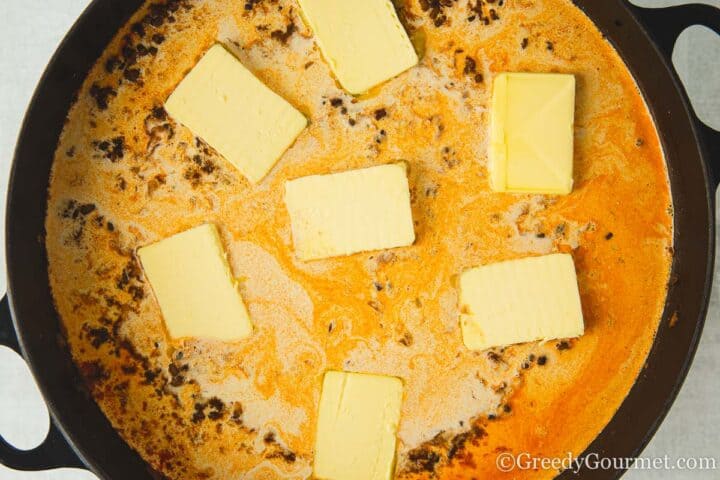
Add butter and cream. Add salt to taste.
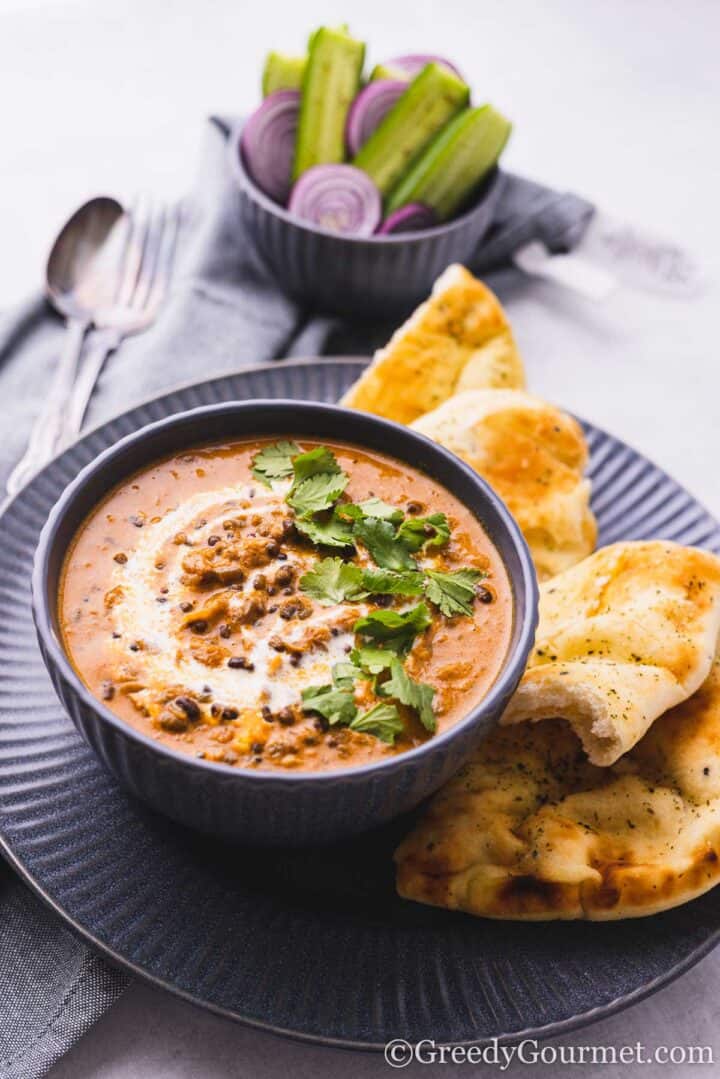
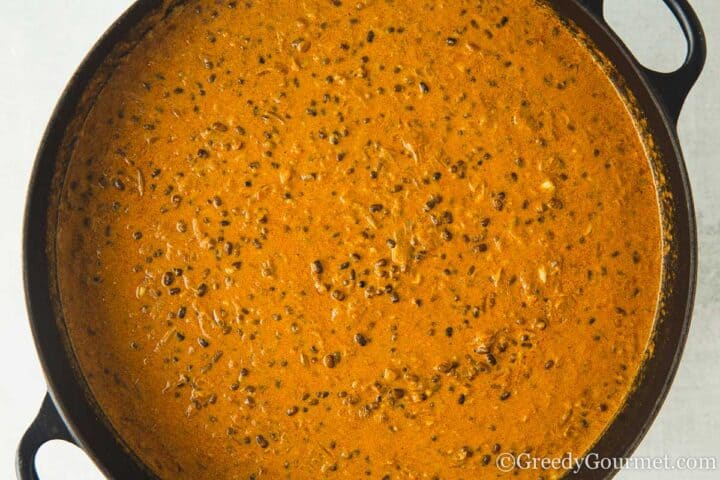
Cook gently for another 20 minutes. Serve as a side dish to an Indian meal. It goes well with paratha and naan!
What to serve with Dal Makhani
Sides
Breads
This dish is usually enjoyed alongside accompaniments that amplify and compliment its flavor, including 2 ingredient naan bread, kashmiri naan, roti, tandoori roti and plain paratha bread.
Would you like to save this?
Rice
This Dal Makhani recipe dish is best served with plain basmati or jeera rice.
Other sides
Other common accompaniments include cucumber raita, pickles or chutney.

Variations to this recipe
- This recipe calls for slow cooking in the oven, but a simple stovetop simmer or low heat slow cooker will also work. You could also use a pressure cooker at high flame (18-20 whistles).
- When preparing Dal Makhani, different cooking approaches can have a huge impact on the flavor and texture. For an added touch of Indian authenticity, you can try the Dhungar method. It will infuse your dal makhani with a sensational smoky tandoori flavor, bringing a restaurant quality to the dish. Mastering various techniques means you'll be able to impress your friends and family even more!
- You can add different vegetables to this lentil curry. The likes of potatoes, carrots, beans or peas provide texture that elevates this delicacy. All these optional enhancements mean you can add your own personal touch, creating your own version of Dal Makhani that stands out from the rest in terms of flavor and presentation!
Popular substitutions
- You can slow cook your own finely chopped onions in place of using onion paste.
- Keep in mind, low-fat or light cream works great with this recipe too.
- You could also add two tablespoons of heavy whipping cream to get an even richer flavor to this dal.
- Leave the ready ground spices and grind your own cumin seeds and the like, for an extra fragrant, extra flavorful Punjabi dal makhani.
- You can replace the fresh garlic and ginger with ginger garlic paste.
Top tips
- Achieving the right mix of flavors is essential to any successful Dal Makhani. The perfect blend should consist of spicy, sweet, warm and earthy notes created by combining garam masala, red chili powder and other ingredients. Be sure to follow the amounts below – when mixed well together, it will be an irresistible, mouthwatering dish.
- I recommend adjusting the different spice blends until you get the right flavor combination which makes this classic Indian cuisine an unforgettable experience! Make sure each element from garlic to dal is perfectly balanced with the spices so everyone can enjoy a delicious piece of traditional food without compromising on taste.
- This recipe's success hinges on achieving just the right consistency when making its signature masala. So, be sure to follow the precise measurements below in order to make sure the consistency is perfect and the dal makhani taste is as luscious as it can be.

What is Dal Makhani?
Originating from the Punjab region in India, Dal Makhani is a classic curry dish, with a long, rich history. One of the most revered vegetarian dishes, this vegetarian dish has countless variations and has developed over time to become a mixture of cooked urad dal and rajma kidney beans, cooked in a creamy sauce to produce an incredibly flavorful slow cooked classic.
With both ingredients well-known staples in Punjab cuisine, the combination makes for one incredible curry that will tantalize your tastebuds and please the whole family!
The foundational flavor is the ghee, spices, onion paste, and garlic, all fried until everything takes on a golden hue. Then the tomato puree and tinned tomatoes are combined with chili powder and garam masala powder before the mix is left to simmer, creating a slow cook dal that takes the breath away.
As you work towards making the perfect Dal Makhani, remember to keep in mind all of the necessary techniques and tricks that will help give your creation a restaurant-style finish. Finding balance within flavors is essential for this traditional Punjabi dish. It's also really important to follow the instructions below for the slow cooking method, in order to get that amazing authentic taste.
What is the origin of Dal Makhani?
Dal Makhani is an Indian dish which can be traced back to the Punjab province, renowned for its wide variety of flavor-filled cuisine. It gained popularity in 1947 due to Kundan Lal Gujral and his iconic take on it from The Moti Mahal restaurants.
Over the years, dal makhani has grown in popularity. Now, not only Punjabi households eat this urad dal recipe, but it's actually being enjoyed around the globe. Traditional recipes use lashings of cream and butter, which certainly help with the taste!
How do you store dal makhani?
Dal Makhani can be conveniently prepared in advance and stored for later. For best results, leftovers should be sealed in an air-tight container and placed inside the refrigerator within two hours of cooking.
You can store dal makhani leftovers for up to 5 days.
Can you reheat dal makhani?
To ensure optimal flavor and consistency when reheating your Dal, butter, cream, as well as kasuri methi (a spice blend) must all be included during this process, either on the stovetop using a pan or with an Instant Pot cooker. With that said, doing so guarantees it will remain sumptuous while retaining its creamy texture throughout storage.
What lentils and beans should I use for this recipe?
Dal Makhani is all about the lentils and beans, mainly black urad dal, also known as sabut urad or kaali urad. The ideal ratio for a perfect dal makhani recipe is 1 cup of whole black lentils (urad dal) to ¼ cups each of red kidney beans (rajma) and dried split chickpeas (chana dal bengar gram). Sometimes whole mung beans (moong dal) are also used.
These lentils will give you an exquisite creamy texture that makes this dish so popular. For best results, you need to soak them in water for at least 12 hours or overnight before cooking.
Do I need to include cream and butter?
Cream and butter are key elements when it comes to getting the creamy indulgent texture that's essential to an authentic Dal Makhani recipe. So, if you're after that incredible restaurant style taste for your Dal Makhani, then whatever you do, don't skimp on cream and butter!
It's through these ingredients that you'll achieve that lusciously smooth texture that's so important for this classic lentil curry – it truly makes a difference!
Keep in mind, low-fat or light cream works great here too. You could also add two tablespoons of heavy whipping cream to get an even richer flavor.
Does Dal Makhani contain onion?
Yes, it uses finely chopped onions. More specifically, for a traditional dal makhani recipe, you need to cook the onions into a sweet, intensely flavored paste. This will form the basis for your dal makhani.
The idea is to add finely chopped onions from the beginning and cook them down until they are completely soft and caramelized. You then need to blitz everything in a food processor until a smooth paste forms.
For this recipe, I've gone for convenience over tradition. Use a ready made onion paste, which tastes just as good as cooking your own and is far easier.
What is Dal Makhani made of?
It's cooked with whole urad dal (black lentils) and spices, along with butter and cream – sometimes adding beans to enhance flavor. The result is a subtly spiced creamy textured curry that lingers long in the memory.
What spices are key to this recipe?
Garam masala, red chili powder, coriander, cumin and paprika all play a key role in creating the right flavor profile for this makhani recipe.
Bringing balance to these spices, tomato puree adds acidity and a pleasant tanginess. As well as enhancing the taste, it also provides a creamier texture. Striking the right balance between all these ingredients is really important when it comes to making this tantalizing dal makhni recipe.
More amazing curry recipes
Once you've created this mouthwatering Punjabi dish, you'll be ready to experiment with more amazing curry recipes. Luckily, I've got a whole host to choose from!
- Mung bean curry – this delicious bean-based vegan curry mixes spices like asafoetida, ground cumin and fenugreek for a fantastic flavor.
- Mixed vegetable curry – a deliciously simple recipe, this one is perfect for a midweek curry in a hurry.
- Marrow curry – a rich healthy dish with a complex combination of flavors, this is one sensational curry!
- Brinjal bhaji – a creamy healthy vegan curry with big bold flavors.
📖 Recipe

Dal Makhani
- Total Time: 6 hours
- Yield: 12 portions 1x
- Diet: Vegetarian
Description
Flavorful and creamy, Dal Makhani is a classic Indian dish featuring black lentils in a rich tomato and spice-infused sauce. Pure comfort in every bite!
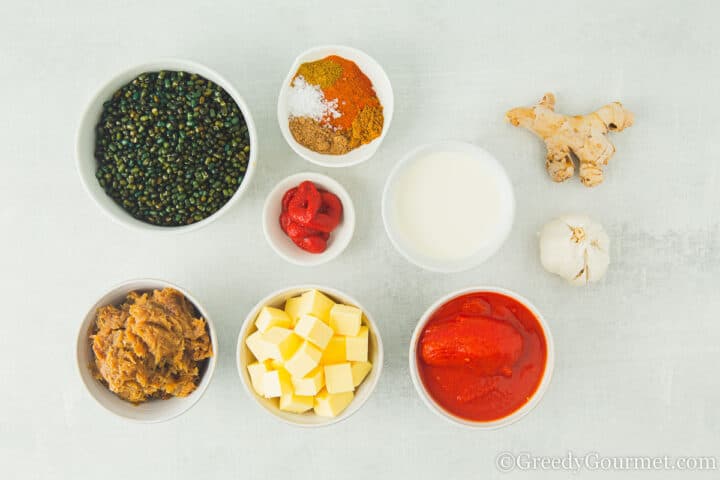
Ingredients
Boiled Urad Dal
- 225g (1 ¼ cups) whole black lentils / urad dal
- 1.25l (5 cups) water
- 2.5cm (1 inch) fresh root ginger, finely chopped
Dal Makhani
- 30ml (2 tbsp) ghee
- 200g (7 oz) brown onion paste
- 12 garlic cloves, pureed
- 2.5cm (1 inch) fresh root ginger, finely chopped
- 10ml (2 tsp) paprika
- 5ml (1 tsp) ground coriander
- 5ml (1 tsp) ground cumin
- 2.5ml (½ tsp) chili powder
- 5ml (1 tsp) tomato puree
- 200g (7 oz) tinned tomatoes, pureed
- 45ml (3 tbsp) garam masala
- 150ml (5 fl oz) single cream
- 150g (5 fl oz) unsalted butter
- 10ml (2 tsp) rock salt
Garnish
- Coriander leaves, chopped
- Double / heavy cream
- Fresh ginger, julienned
- Kasuri methi (dried fenugreek leaves), crumbled
- green chilies, finely sliced
- lemon wedges
Instructions
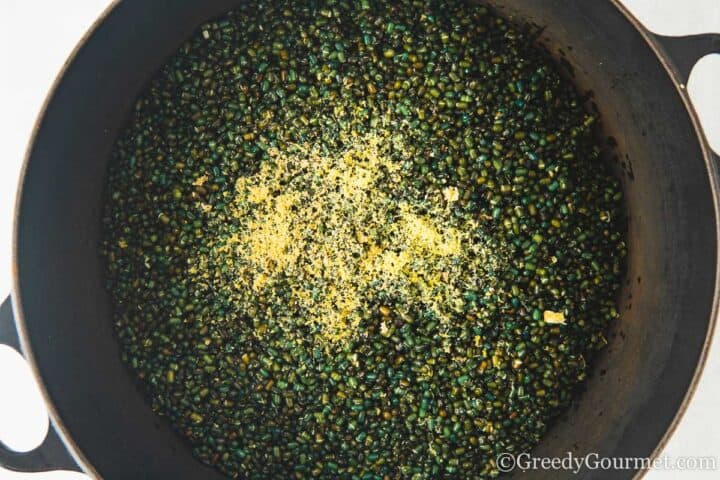
- For the Boiled Urad Dhal: Soak the lentils in plenty of water for at least 12 hours. Drain and rinse well.
- To cook the lentils, bring the measured water to the boil in a 2.5 litre (4½ pint) saucepan. Add the lentils and half the ginger. When it returns to the boil, stir to ensure nothing is sticking to the bottom of the pan.
- Boil for 10 minutes, then reduce the heat to very low and simmer for a further 1 hour or so, stirring from time to time. By this time, the lentils should have absorbed all the water and be soft, not al dente.
- For the Dal Makhani: Preheat the oven to 180°C/350°F/gas mark 4.
- Heat the ghee in a 2.5 litre (4½ pint) ovenproof casserole dish.
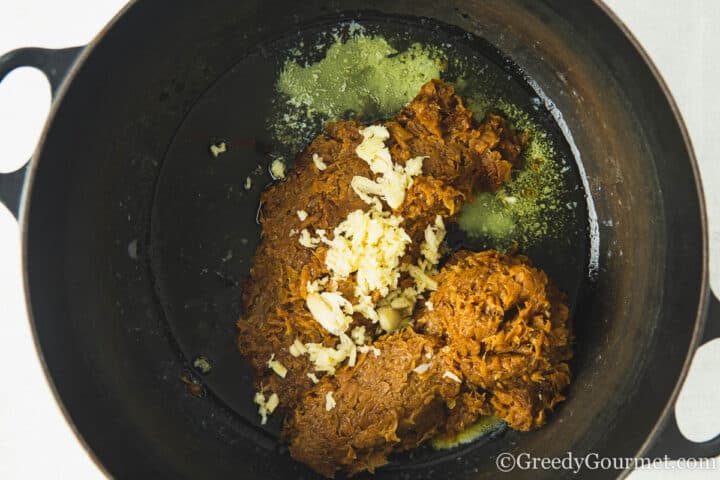
- Add the brown onion paste, garlic and ginger. Fry it for a few minutes, while stirring constantly.
- Add the paprika, coriander, cumin and chilli powder. Stir fry for another 3 minutes or until the spices’ aromas get released - you will smell it.
- Mix in the lentils.
- Add the tomato puree, tinned tomatoes and garam masala to the lentils. Cook for a further 15 minutes, adding a cupful or two of water as needed so as to retain a pouring consistency.
- Cover the casserole with a lid and transfer it to the preheated oven. Cook for at least 3 hours. Check the consistency of the mixture every 40 minutes or so – adding water to maintain the pouring consistency.
- On your last check, add the cream, butter and salt and give it a final 20 or so minutes cooking in the oven with the oven switched off.
- Garnish with any of the ingredients mentioned above. Serve with plain or jeera rice, naan, roti, paratha, cucumber salad, raita, pickles or chutney. Enjoy!
Notes
- Traditionally, a mixture of black lentils, red kidney beans and yellow split peas should be used in a ratio of 4:1:1. For simplicity I only used urad dal in the recipe but there’s nothing stopping you from using different pulses of your choosing and playing with the ratios.
- Since this dish is cooked long and slow, it’s the perfect recipe for a slow cooker.
- This isn’t the quickest recipe to prepare and is essentially a labor of love because it tastes just so damn good. To get the biggest bang for your buck, double up on the ingredients. Heck, I used 1.5kg of dried urad dal, which means I multiplied the ingredients by 6! Just make sure you have a big enough pot to cook it in.
- Of course, when you end up with such a big batch of this awesome dish, you need to store it. It freezes superbly! So split it up into batches and enjoy if and when it strikes your fancy.
- If you don’t have ghee, use butter.
- Prep Time: 30 minutes
- Cook Time: 5 hours and 30 minutes
- Category: Side Dish
- Method: Simmer
- Cuisine: Indian
Nutrition
- Serving Size:
- Calories: 242
- Sugar: 2 g
- Sodium: 409.7 mg
- Fat: 16.9 g
- Saturated Fat: 10.4 g
- Trans Fat: 0.2 g
- Carbohydrates: 16 g
- Fiber: 2.8 g
- Protein: 5.8 g
- Cholesterol: 46.1 mg

Renil M. George
Always love indian food, great flavors . thank you
Michelle
Ja, ek het lekker opgedonner. 😀
You really should try it though; I look forward to hearing from you again!
Michelle
You're welcome!
Michelle
You're welcome!
Cat
Thank you for adding the Garlic amount 🙂
Michelle
12 garlic cloves, as stated in the recipe. 🙂 Hope yours turns out grand!
Catnight
Hi Michelle,
I am making this recipe right now and had a question. How much garlic do you add? I see Garlic mentioned in the direction but not listed in the ingredient list?
Thanks
Cat
Michelle
Oh, if you only smelled it for real. I dare you to make a batch, you'll be hooked forever.
Michelle
Thanks, Amy. A lot of time can be saved by making your favourite recipes in bulk!
Myra
Is the 3-hour baking part necessary? Do you think it would make that much of a difference if I did that part in a pressure cooker?
Myra
Is the 3-hour baking part necessary? Do you think it would make that much of a difference if I did that part in a pressure cooker?
Amy (Savory Moments)
What a beautiful and flavorful dish. I LOVE Indian food so much and I love that you made it in a batch to freeze more for later. Such a great idea!
mjskit
OMG! What a process, but I can see that the result is well worth it! The smells coming from those gorgeous pictures are incredible! I don't think I have ever had dal makhani, but I am definitely curious now. It looks like the ultimate comfort food! Thanks for presenting this and providing such great instructions! I, too, am a batch cooker. Chilis, stew, beans, all make great freezer meals!
nags
looks fantastic! i cook this very often but never realised the steps were these many until i saw your instructions 🙂
nags
looks fantastic! i cook this very often but never realised the steps were these many until i saw your instructions 🙂
Michelle
Yes, Nags. This recipe is quite involved but so worth the effort!
mustardseed
I love dal makhani and I love how you well you have explained it! It looks absolutely perfect!
Franglais kitchen, Nazima
what a lovely recipe. I do make daal from time to time and these pictures are gorgeous. Indian food has so many layers of flavours.
Camilla @FabFood4All
Wow that was a marathon of a recipe and I'm sure that my husband would be in heaven if I cooked this for him! I'm glad that I'm not the only one to have hiccups in the kitchen, my carrot and coriander soup had to have a re-name when I realised I'd used parsley instead, but luckily it still tasted good! Lovely photos, keep up the good work:-)
SheBee
Jeeeeez, 4 days later and you cock it up with salt? Sounds like something I would do!
This looks delicious though, will definitely add to my to-make list.
Jeanne @ Cooksister
Mmmm, I LOVE dal Makhani! Might have to come over to your place to eat it though as I am not sure I have the fortitude for a 4-day event 😉 Also, you have space for 45 portions of anything?!? Wow! Superb photos as always and now I am absolutely craving lentils...
Fuss Free Helen
Goodness me, what an effort and I am so glad you averted disaster at the last moment!
45 portions is an awful lot... There would never be the space in my freezer....
Beautiful photos as always, and glad your JO knives are still going strong...
Rosa
That is such a great recipe! I am bookmarking it. Your dal makhani looks ever so scrumptious and comforting.
Cheers,
Rosa
Michelle
Thanks, Rosa. Let me know how it turns out!